Upgrading Our Lightning Flow Roll-Up Summary
Welcome back Trailblazers. Last time we showed you how to create a Roll-Up Summary using a Lightning Flow. We’re back again to update our flow to give us a two for one deal. One flow, for two Roll-Up Summaries. If you are new to the page check out our first article: Fine, I’ll Make My Own Roll-Up . We will be using this flow as a foundation for our changes so we do not have to start from scratch. You ready to get started?
Roll-Up Summary Fields Needed
In our last article we created the field Open Cases(Open_Cases__c) on the Contact object. For this article we want to expand this by also tracking how many Closed Cases the Contact has as well. So we need to create a number field on the Contact object. I’m calling mine Closed Cases(Closed_Cases__c). I know, I’m super original. This will also be a number field with no decimal places.
Back To Our Roll-Up Summary Flow
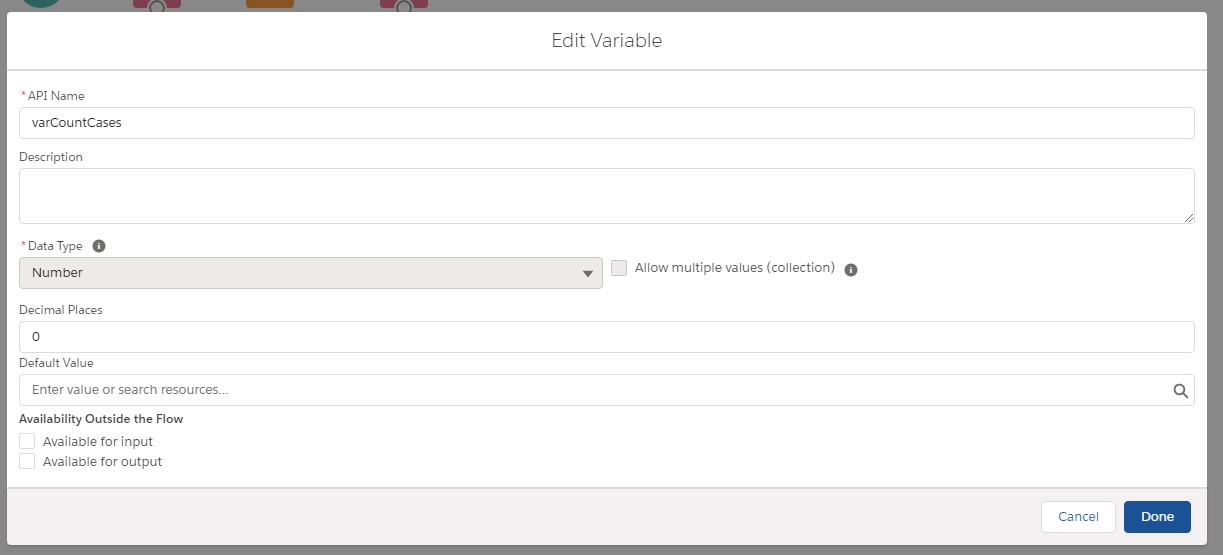
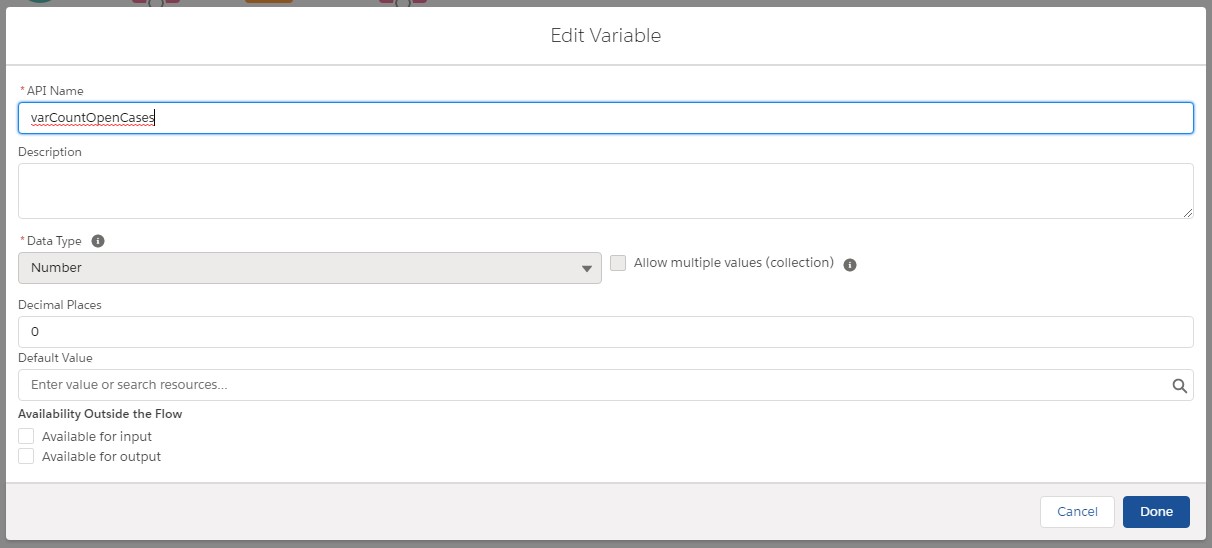
Welcome back to our Roll-Up Summary Flow. To make things easier on ourselves lets make our count variable now. We currently have variable called count cases. Lets update this variable to reflect it is for open cases by renaming it to varCountOpenCases. Now we can make a variable to count the number of Closed Cases. I’m calling it varCountClosedCases. It will also be a variable, type number, with no decimals.
Update Our Get Record
Previously we filtered the cases we retrieved to only include those that were not marked as closed*.
*Perhaps we should have noted this in our last article, but the IsClosed flag is a checkbox on the case object. Using it allows us to check if it is closed without having to account for all the different case statuses.
Now we want to look at all the cases the contact has had so we will remove the line IsClosed Equals {!$GlobalConstant.False}.
We will retrieve all of the records at once. We could clone the GetOpenCases and switch the filter to true and just run two gets and get the counts. In this instance we are not because it would be searching the same records twice. For clarity I am also going to rename the node GetCases for easier recognition. Click Done and we are now successfully pulling all of the needed Case records.
The Dreaded Loop
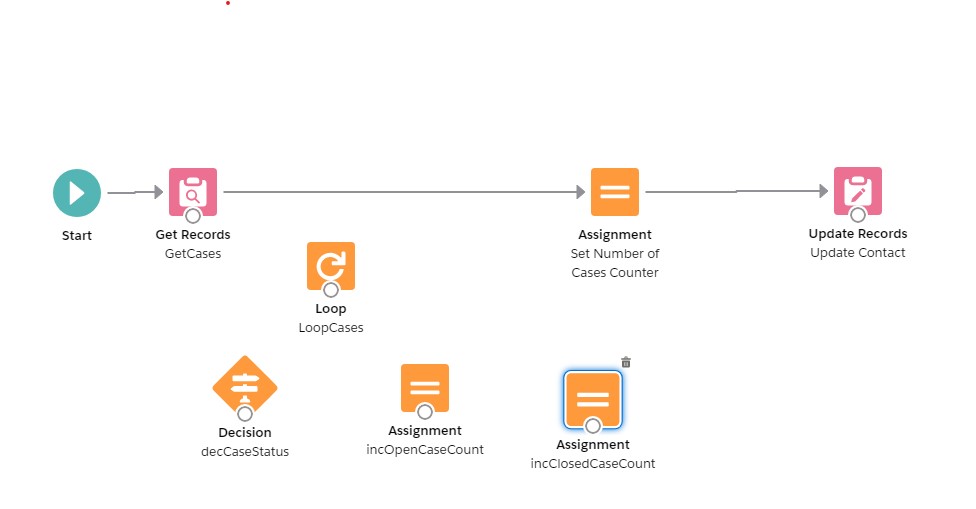
Remember when we clicked the How Many Records to Store – All Records? Good times. When we did that we created a collection. In our first version of our flow we used an assignment to count how many records were in our collection. This time we want to separate our collection into two groups: open or closed cases. To do that we will need to check each of the records to categorize it and update the appropriate count.
If it helps think of a loop like opening a book. In a book there may be 10 pages there may be 100. You want to see the information on each page and review its contents and move to the next. A loop in a lightning flow allows you to perform the same action for each page. First we are going to tell the Lightning Flow that we wish it to take the book and go through each of the pages. Lets grab that Loop component and add it.
Filling Out the Loop
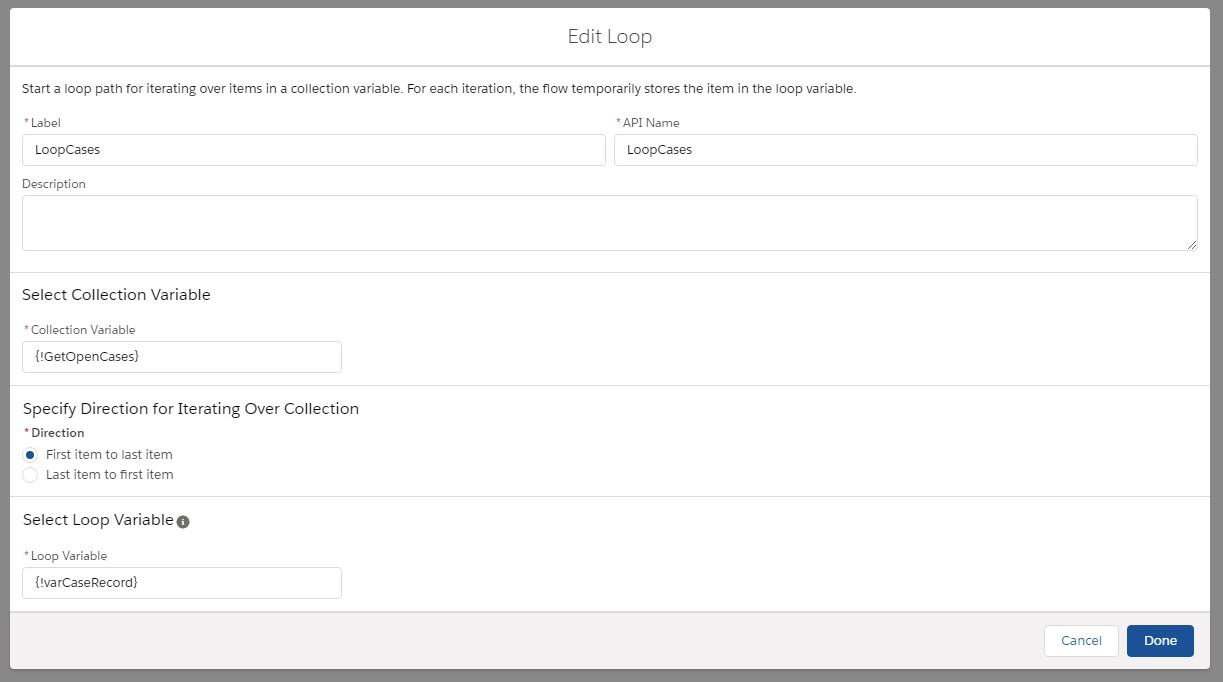
First up put in a Label and unique API name, it will make the red angry lines go away.
Next up specify our collection variable. As we mentioned before, when we got the Case records it automatically created a collection for us called {!GetOpenCases}. Select this option for the collection variable.
For our purposes it does not matter which direction we iterate over, so we can leave it first to last.
Now that we have entered the collection variable, the Loop Variable field becomes available. Remember how we said a collection is like a book, well our loop variable is like a page. As we look at the page to read and act on, we need a way to separate the information from the rest of the book. The loop variable acts like our page. The good news is as we go through each page (or in our case, Case) the loop variable will resource and take the specific Case information from the Case book. When it is done with that page, it will turn to the next page and repeat.
Create the Loop Variable
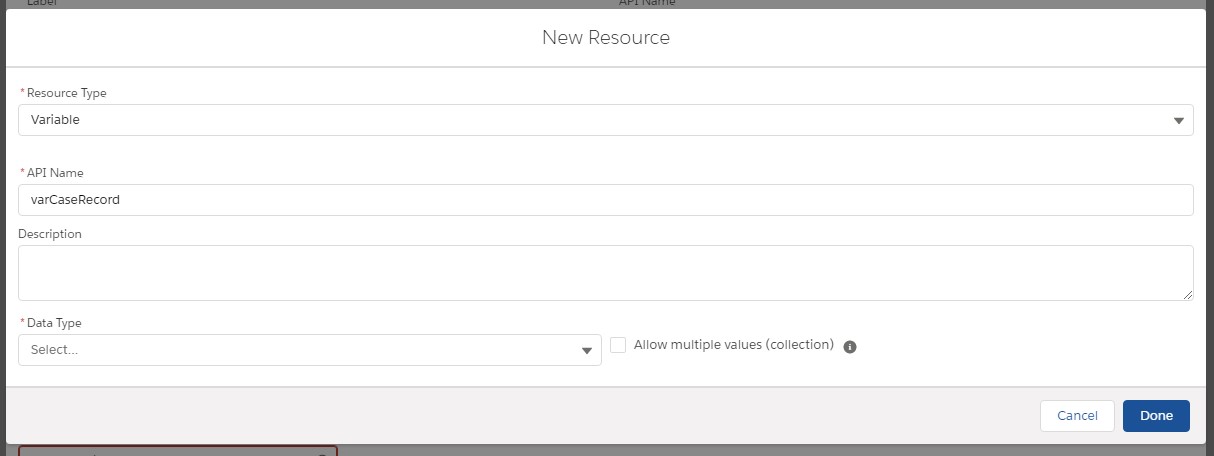
If we click in to the Loop Variable field we see there are no options available. That is because the loop needs to have the correct frame work to push the data in to, in needs to know it is looking at is a Case. So we need to create a Record Variable that is not a Collection Variable.
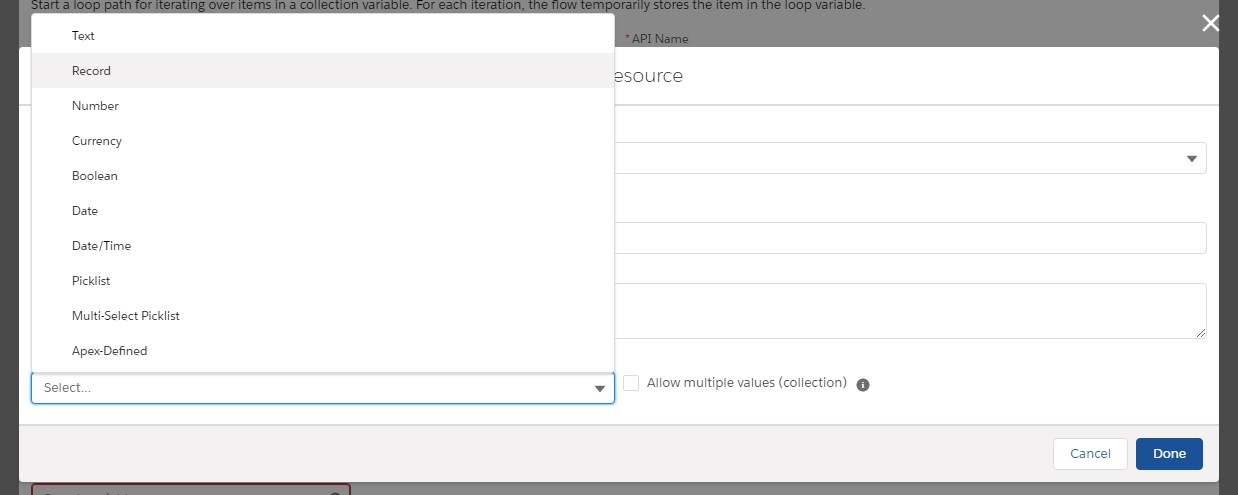
To start select to create a new resource with resource type of variable. We are going to use the API name varCaseRecord. The Data Type is going to be Record. An additional field is now visible for Object, select Case. Make sure you do not select Allow multiple values (collection). Select Done.
Once we hit done we can see the Loop Variable field is now automatically populated with the record variable we just created. Now that our Loop node is filled out we are ready to select Done.
Create the Decision
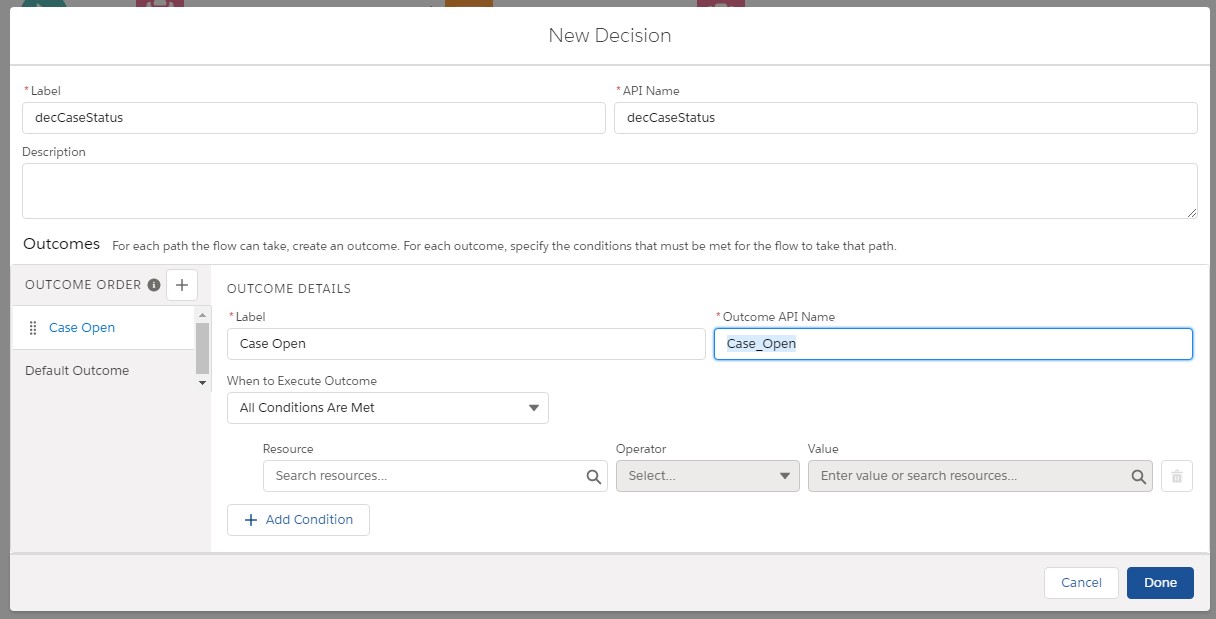
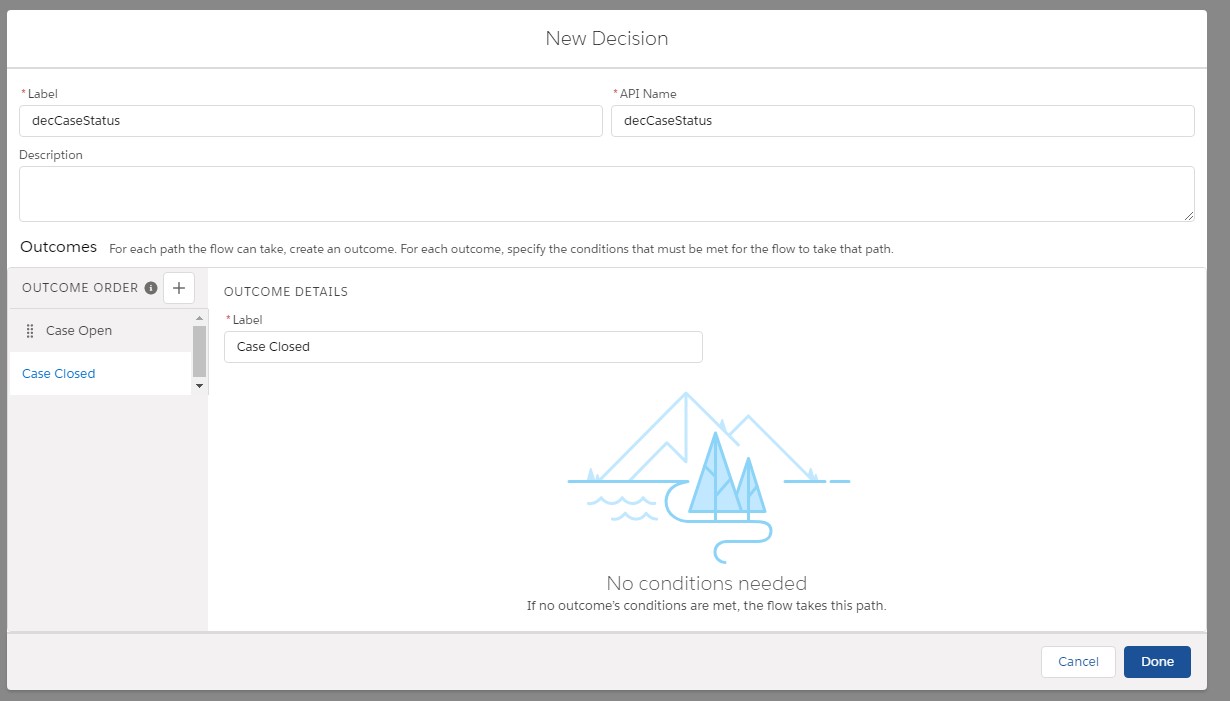
Now that we will be going through each of our cases, we need to define what we want done. In our case we want to update the correct counter for the either Open or Closed case. To do this we will use a decision node. Drag the Decision Node onto the screen and give it a Label and unique API Name. Next up we look at the Outcome. These are where we determine how we are separating the records, in our case, open case vs closed case.
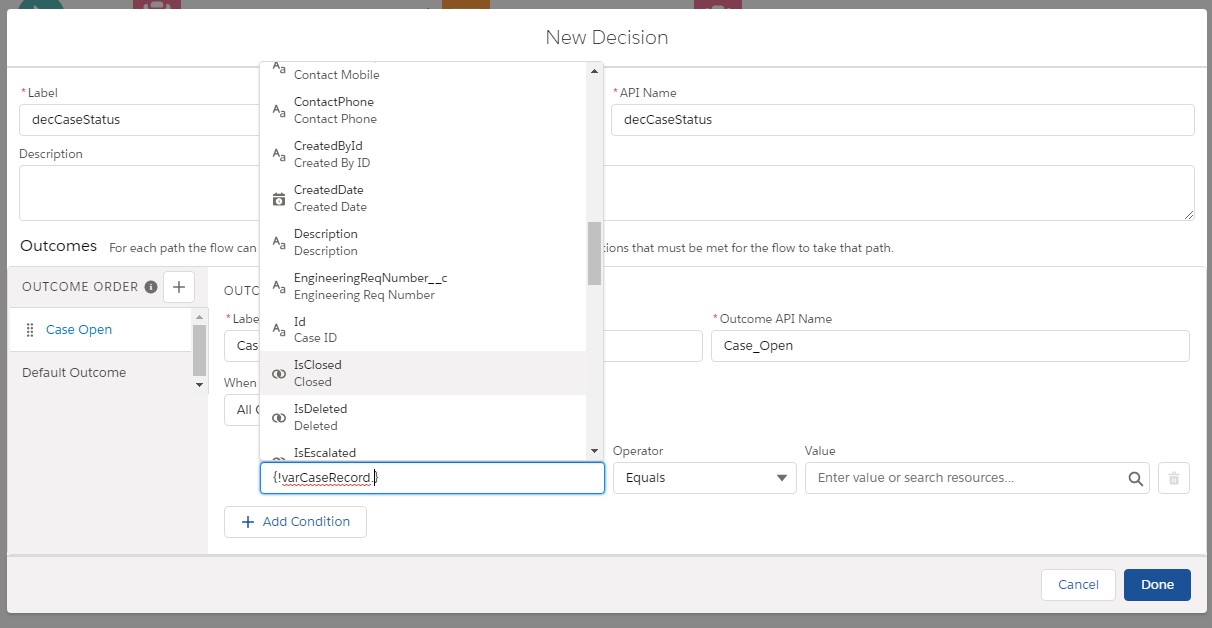
For the first outcome provide a label and unique API name, I used Case Open(Case_Open). We can get pretty elaborate with the criteria, but for our use case we are going to check the Case record we are currently looking at (using the varCaseRecord identifier) and check whether the isClosed flag has been checked. As we are looking for open cases we want the isClosed flag to be set to False ({!$GlobalConstant.False})
Next up is defining our Default Outcome. For our use case we can utilize the Default Outcome because the isClosed field is a checkbox. If its not False it must be True. In our Case Open Outcome we specified for isClosed = False, all other records will be True. Still lets update the label of the Default Outcome to something that will be easier to recognize later, in my case I’m using Case Closed. With both of our outcomes specified we can select Done.
Do Something About It
Now that we have created our decisions as the loop goes through it will separate our records into two buckets, open and closed. However, as it looks at the page and realizes what kind of case it is, it moves on to the next because we didn’t tell it to do anything about it. The loop is basically begging us to tell it what to do with this information. In our first version of our flow we used an Assignment to set the number of cases. In this case we are instead going to increment our counters.
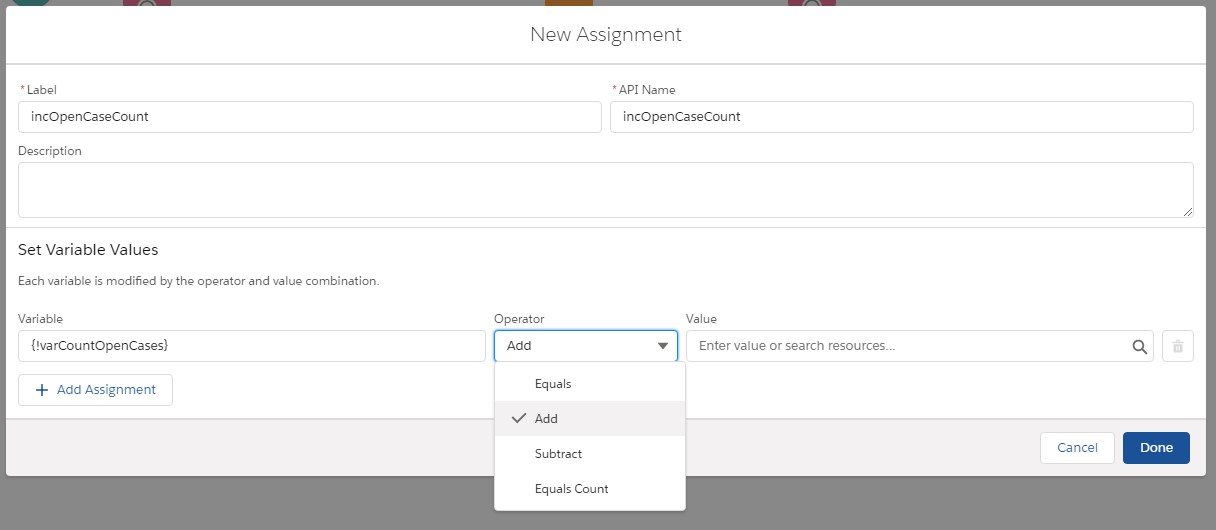
Quick Note: As we are incrementing we will want to update our count variables (varCountClosedCases and varCountOpenCases) to have a default value of 0. Otherwise we are trying to add 1 to a blank value (Salesforce does not approve of this).
Create the Assignments
We will need to create two assignments, one that says to update the varCountClosedCases and one to update the varCountOpenCases. As before give your Assignment a Label and API Name. For the variable we are going to reference our count variables and select the add operator and add 1.
Starting to Put the Pieces Together
Now we have a bunch of components on a page without a connection, its time to start connecting the nodes. Follow the steps below:
1. Delete the Assignment Set Number of Cases Counter – this is the node we are not using because we are incrementing
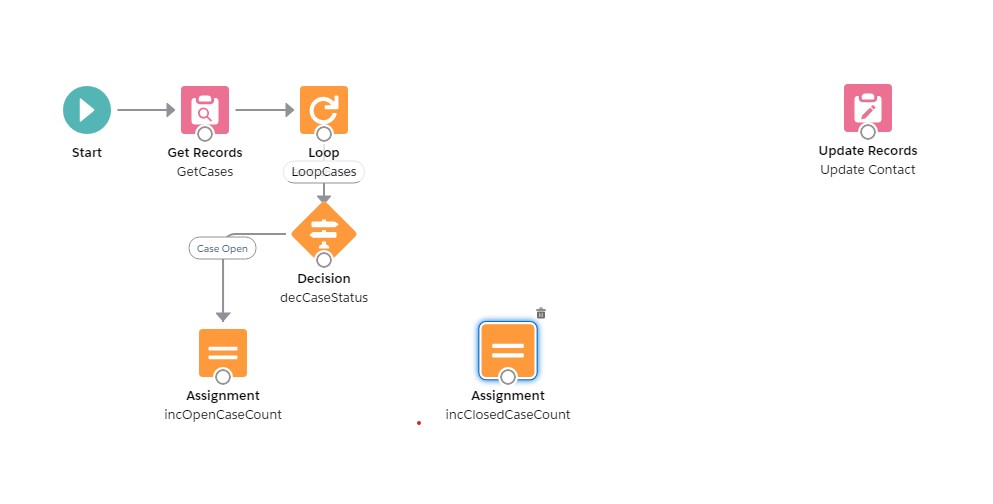
2. Connect the Get Records GetCases node to the Loop LoopCases node so we can loop through the collection
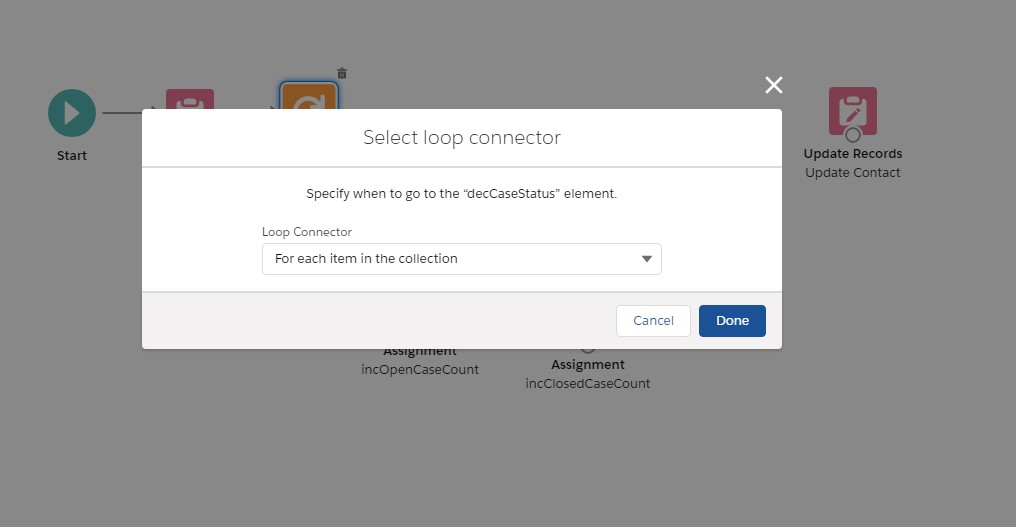
3. Connect our Loop LoopCases node to our Decision decCaseStatus now – when the loop picks up the record it will go to the decision to determine which path that particular case should take. Select the loop connect For each item in the collection, we want all of our records to be checked against the decision.
4. a. Connect our Decision decCaseStatus to our Assignment incOpenCaseCount – Select the Outcome Case Open in the prompt
b. Connect our Decision decCaseStatus to our Assignment incCloseCaseCount – No prompt will appear as there was only one possible outcome left
5. Connect our Assignment incOpenCaseCount back to our Loop LoopCases – this allows the next Case to be selected and sent for review.
6. Connect our Assignment incCloseCaseCount back to our Loop LoopCases
7. Connect our Loop LoopCases to our Update Records UpdateContact – note the tag that says After Last Item automatically appears to indicate it is what occurs after we have looped through all of our cases.
Update the Roll-Up Fields
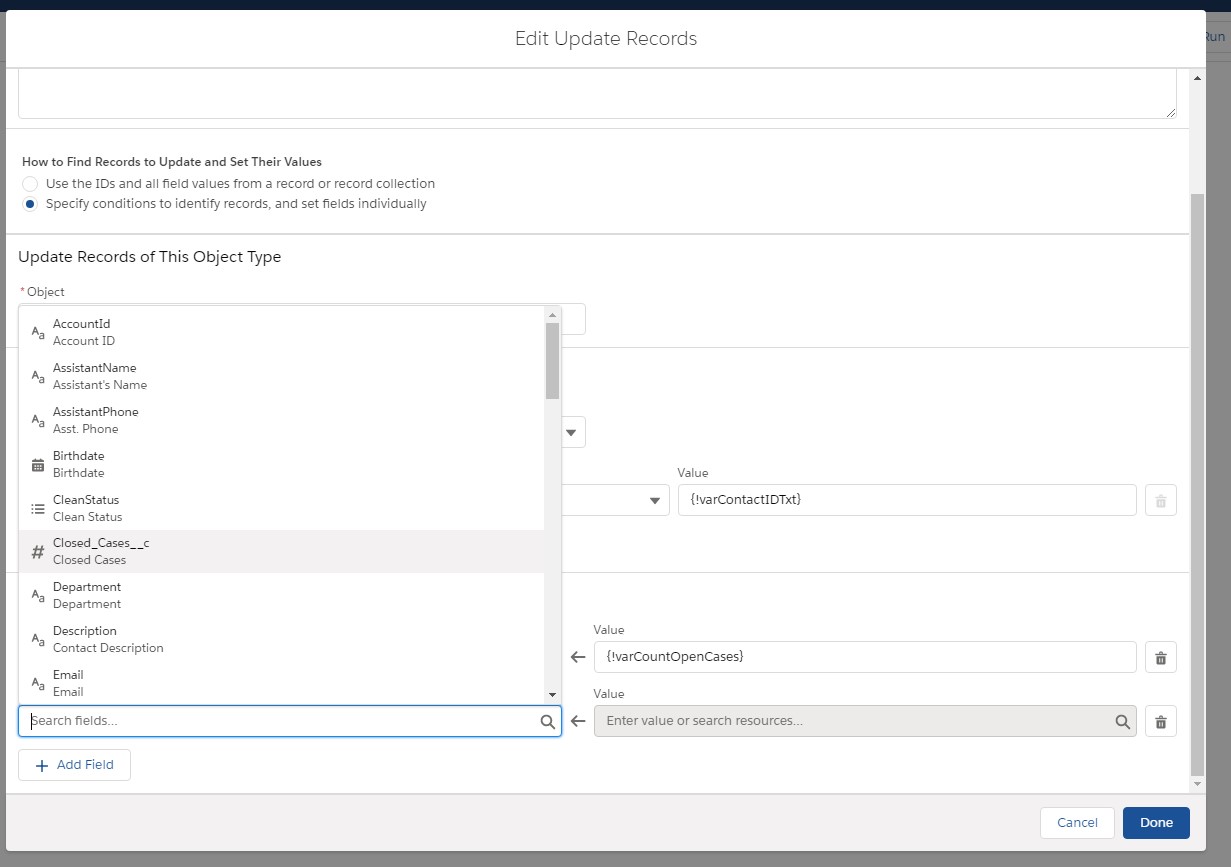
Finally it is time to update our Contact record. We do still need to update our Roll-Up field for closed cases though. Open the Update Record Update Contact node. Note how the Open_Cases__c field is referencing the new variables name, thanks Lightning Flow for handling that for me. Now we can add the new field we created by selecting Add Field. A new row appears. Set our new Closed_Cases__c field equal to our varCountClosedCases. Select Done and you are all set. Don’t forget to save your flow as and activate it.
Check out our final Roll-Up Summary two for one flow
Great Work Trailblazer!
Stay tuned for more Lightning Flow How To’s and an upcoming build along.
Check our Lightning Flow feed to see if you missed any. Otherwise, we’ll see you on Trailhead.
Stay safe Trailblazers.

